I recently sprang for a MOMO Prototipo and new MOMO hub set for the red 2002. A friend sold me a barely used Prototipo and the installation was pretty easy.
So when the time came to get a fancy new wheel for the turkis (blue) 02 I opted for an eBay search for a vintage wheel. I never really cared for the Alpina 4 spoke wheel, something about that center pad bothers me. But, I did find the same wheel (a MOMO Sigma A38) for sale in Portugal without the Alpina center pad. And, while I had the dash apart to install it I snapped some photos. (As a side note I find the 350mm Prototipo to be a little small both in wheel diameter and thickness of the wheel itself. However it does give me a little more leg room in the 2002. The MOMO A38 is a little larger in diameter and has a thicker grip.)
The install is straight forward but you do need:
– a MOMO wheel of your choosing (there are plenty available new on Amazon: Prototipos, Retros, Indys, Monte Carlos, any of which would look great on a 2002.
– a MOMO hub set (also available from Amazon)
– A horn button (BMW of course)
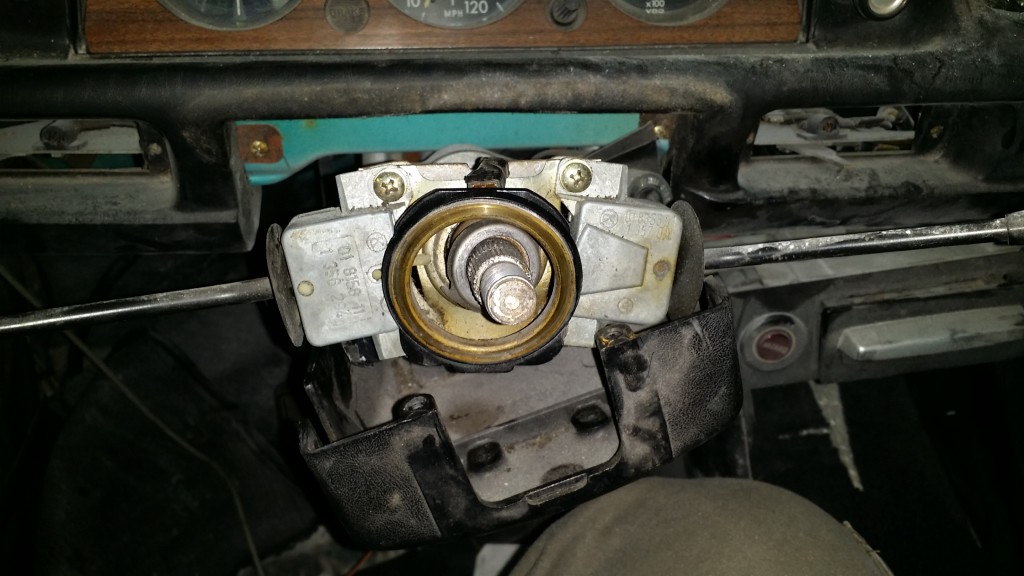
First align your wheels so that they are pointing as straight ahead as possible and the steering wheel is correctly centered. Then remove your old wheel. I use the 4 way tire iron 22mm socket to loosen the nut. It fits well, has good leverage and you can hold the wheel with your knees while loosening. Again, make sure the wheel is centered and the tires are straight before you remove the old wheel. Carefully removed the nut and the washer. Also, TAKE NOTICE OF WHERE THE TURN SIGNAL CANCEL TAB IS! It’s the little metal tab and ring that is held in place but the nut and washer on the splines of the steering shaft. You can just see it in the image below. The little white plastic tab is the turn signal cancel which the tab must hit to cancel your signal. Pull straight back on the wheel and it should come off the splines. If your car has been sitting a while it could be a little corroded and need some extra muscle or prying with a large flat head screwdriver.
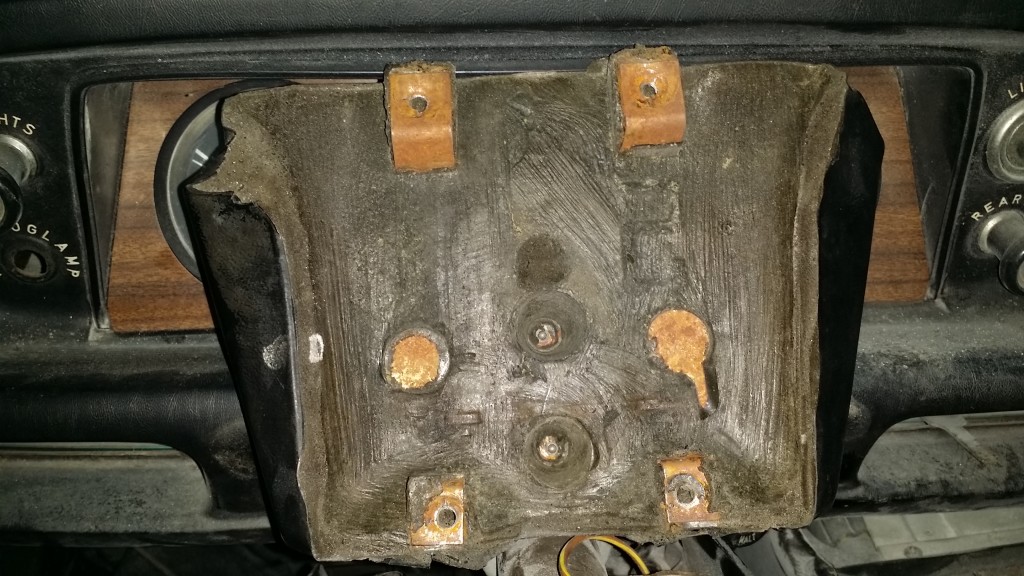
You don’t really have to do much with the horn contact ring for the MOMO swap. The new hub has a correct horn spring contact that works just fine, unlike the 320is wheel and hub. If you removed the upper and lower covers you’ll need to make sure the horn contact ring is snugly fit back in place. First slide the vinyl covered top piece in so that the rear metal tabs line up with the lower screw holes. The metal tabs on the vinyl piece may need to be compressed a bit to make it fit.
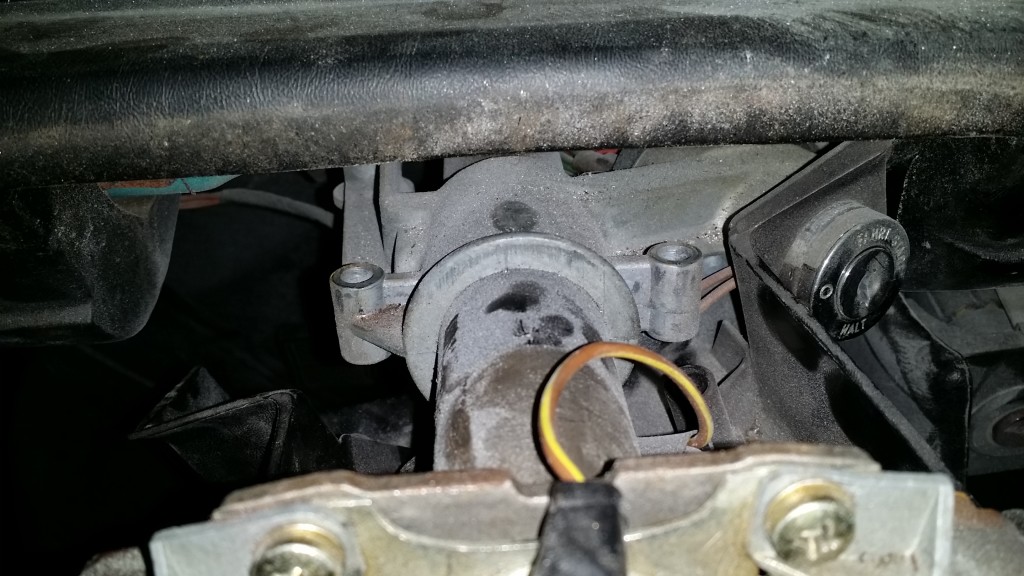
Slide the back of the cover under the dash so the metal tabs align with the two cylindrical metal holes. See below.
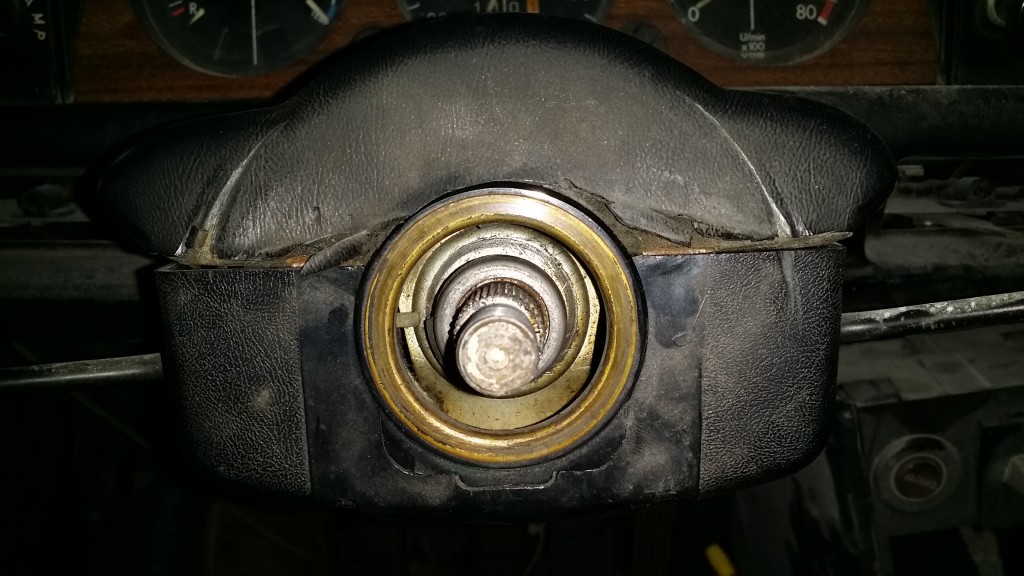
Next, securely set the horn contact ring (the brass ring above) in the slots of the lower plastic housing. Press the upper and lower cover pieces together while keeping the contact ring set in place (there is a cut out on the bottom cover that fits the contact ring perfectly, keep it flush with that contour.)
Replace the 4 long screws up from the bottom making sure they are catching inside the metal tabs on the top vinyl cover. Add a bit of dielectric grease to the surface of the contact ring. It will help with minimizing the scratchy noise you’ll hear when you turn as the horn contact slides over the ring surface. It should look like this when you are done.
Then place the turn signal cancel tab back in place making sure it is facing in the same direction as it was when you removed it. If it isn’t placed correctly your turn signal won’t cancel after you finish your turn and your wheel returns to the centered position. Usually I put it facing at about 8 o’clock.
Bolt your new wheel to the new hub using the hex head screws and allen wrench that are included with the hub. You’ll need to install the horn button retainer as well. It goes between the hub and the wheel. Install it so the lip of the retainer sticks out a little from the center of the wheel as it faces you. Snug the hex head screws down tightly.
Place the new MOMO wheel/hub over the cancel tab and then install the washer and nut. Tighten the nut down snugly using the wheel to help tighten the nut. Make sure the wheel is centered to your liking and that your tires are still straight.
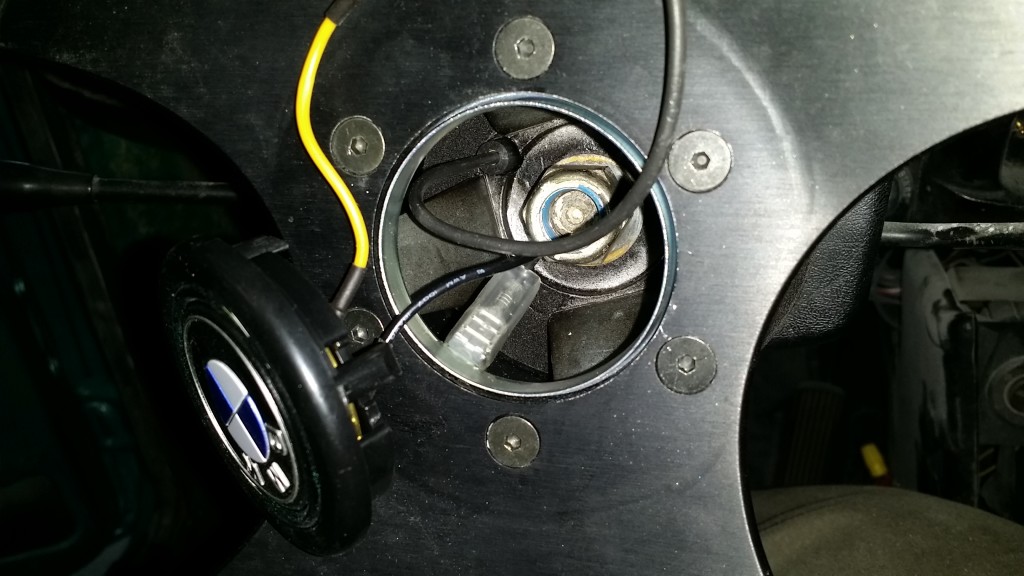
Next connect the horn button. There is a spade connector on the horn button retainer as well as one that connects to the spring loaded horn button contact. Connect the black wire on the horn button to the retainer ring. Connect the yellow wire on the button to the wire leading to the contact. Run a piece of electrical tape or use heat shrink over the spade connectors for the spring contact and then gently snap the horn button in place making sure you have the wires out of the way.
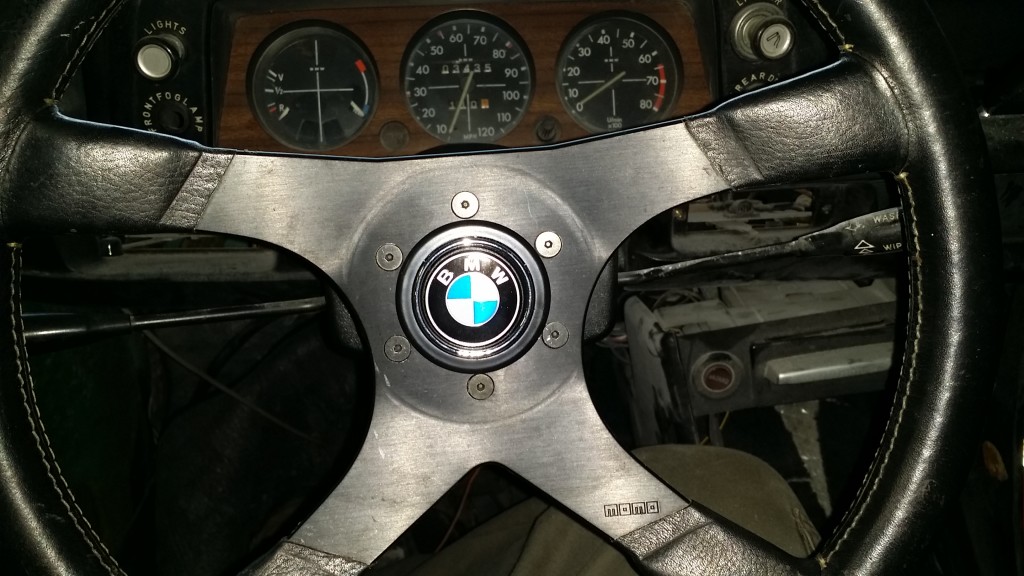
And that should do it. Make sure the wheel is securely tightened and take it for a spin. Check to make sure the horn button works and that your wheel is centered to your liking as you drive in a straight line.
Enjoy!

