
Well, after almost 96,000 miles it was time for a new water pump. After replacing the inferior original thermostat with an upgraded one in 2009, I once again started noticing coolant loss from the reservoir tank and hearing the familiar sloshing sound behind the air conditioning/heater controls. The sloshing sound was coming from the heater core indicating that the coolant level had dropped and air had been introduced into the system. I figured it was highly unlikely that the thermostat gasket had failed again. A quick peak under the car during an oil change revealed that quite a few blue coolant boogers had dried on the A/C compressor, which is directly below the water pump. Time for some wrenching.
Firstly let me start with a disclaimer. Replacing the water pump on your R50 MINI Cooper is not an easy job. This is not like changing your oil or even doing a brake job. You have to remove the front half of the car to even see the water pump. This means lots of careful removal of plastic parts, the metal bumper, keeping track of lots of bolts and screws as well as draining the radiator…and all of that before you ever remove the water pump. If you are a relatively experienced mechanic, this will be something that you can handle just fine. But if you’ve never attempted something of this magnitude, it may be best to seek help from an experienced mechanic buddy or just pay up at the dealership or your favorite shop.
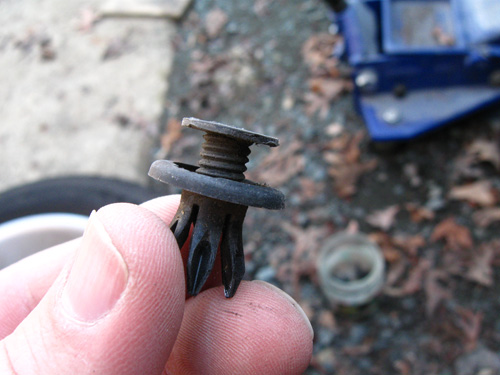
The first step was to raise up the front end of the car and remove the front wheels. I am always sure to use jack stands to secure the car. Once the front wheels were off I removed the inner fender covers. This is an easy job but the little black plastic fasteners can be a pain. Here’s a tip, use a Phillips head to unscrew the center cap while simultaneously gently prying up the plastic cap with a tiny flat head. The center part should unscrew easily and allow you to remove the whole fastener. There are also a couple of real, metal screws holding the cover on near the shock mount and under the front bumper cover.
Next, I removed the lower bumper cover…not that part that has the grill and turn signals in it. There’s a smaller plastic cover that mounts below the engine and radiator and is attached to the bumper cover. Remove the two Phillips head screws and the three 10mm silver bolts to slip it out of the way. Mine had a crack starting to form so I slathered it in epoxy to stave off a full on break.
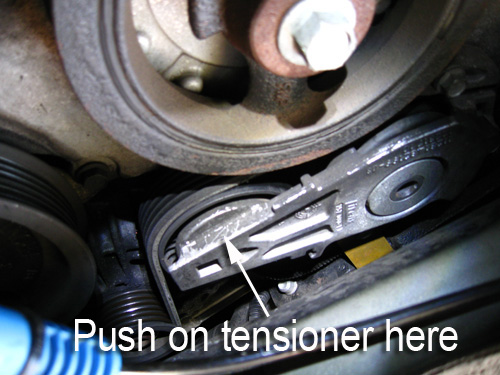
You’ll need to remove the serpentine belt too, might as well do that now. I use my nail puller (you know, one of these things) to created enough leverage to push up on the belt tensioner from below and slip the belt off the idler pulley with my free hand. It takes some practice but now I’m pretty good at it. Be sure to make note of how the belt loops around each pulley. It’s pretty obvious really as the ribbed parts of the belt need to be in contact with the grooved pulleys. The idler is the only one without a grooved pulley so the back side of the belt is looped around that.
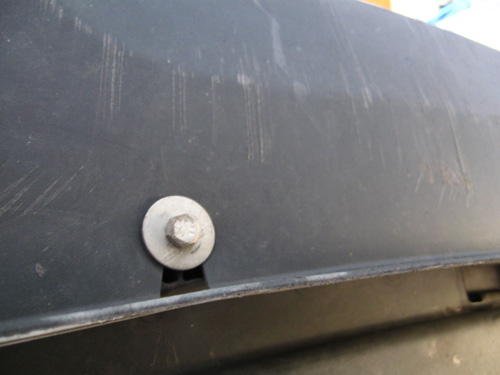
Pulling the bumper cover off isn’t a big deal. There are a two bolts near the wheel well area that look like this:
You’ll need to have both fender wells off the car to get to those. Next remove the two Torx head bolts…you do have a Torx head socket kit, right? They are located along the upper edge of the cover.
And lastly disconnect the turn signals, side marker and parking light connections. These should disconnect easily when you apply pressure to the latch and pull the connection apart. The bumper cover should drop off and you can fish the wire connections through the back. If you have the factory lower fog lights installed those connections will need to be disconnected as well. Also, the sensor probe that measures outside air temperature is mounted in the lower portion of the bumper cover. Use caution when lowering the cover as not to snap that little bugger off. Set the bumper cover aside on a soft blanket so you don’t scratch up the paint.
Now you’ll need to drain the radiator. Remove the filling cap and undo the lower radiator hose that is located on the bottom edge of the radiator on the (US) driver side. I use large channel lock pliers to grip the spring clamp and slide it off the radiator tube. Wear goggles or a face mask or a divers bell because you’re probably going to get a face full of coolant when you slide the hose off the barb. Work slowly and you can contain the mess. You’ll need a bucket that can hold a gallon or so, two gallons to be on the safe side. I got around a gallon of coolant, but probably lost a quart or two while not paying attention.
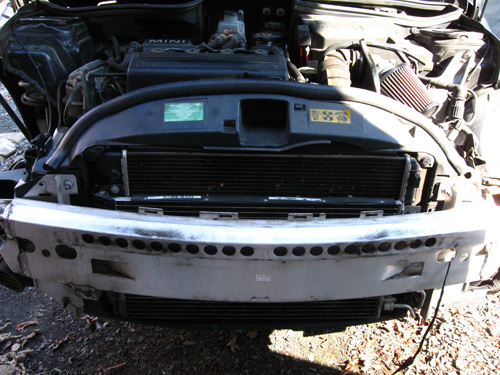
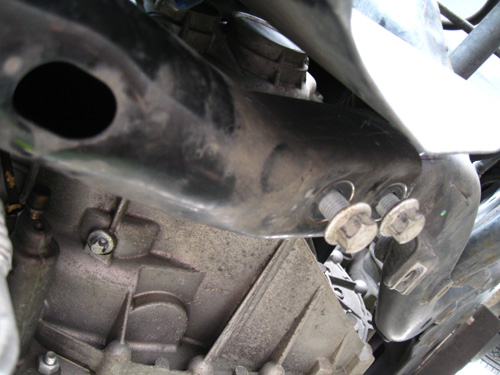
To remove the radiator entirely, you’ll have to drop the entire front panel. The radiator and fan are attached to a large plastic panel. Disconnect the upper radiator hose and leave the lower one disconnected as well. You’ll need to remove the aluminum bumper too. This isn’t difficult but 10 nuts/bolts secure the bumper to the car. Here’s a shot with the bumper cover removed showing the aluminum bumper:
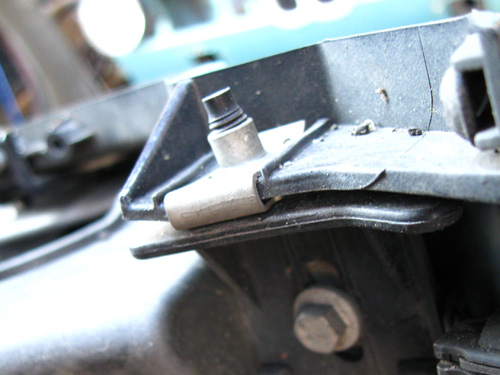
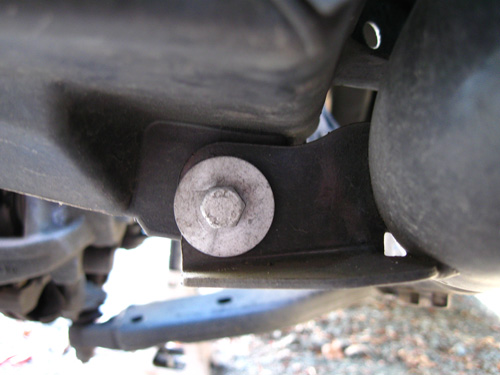
Remove the nuts and bolts and set the bumper aside. Next the bumper mounts need to come off. Two bolts hold the mounts in place, once removed the mounts slide off. I had to pry the mounts loose with a flat head screw driver as they were a bit stubborn. Here is a photo of the bumper mount bolts shot from under the car:
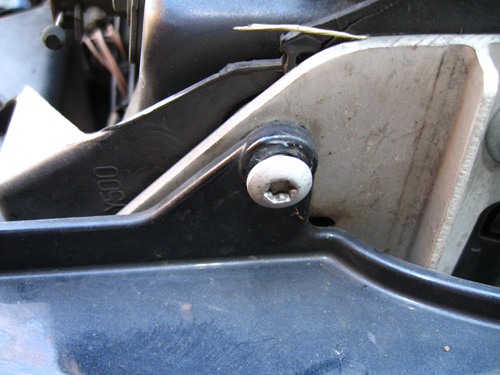
And here’s a shot from the front showing the mounts after the bumper has been removed:
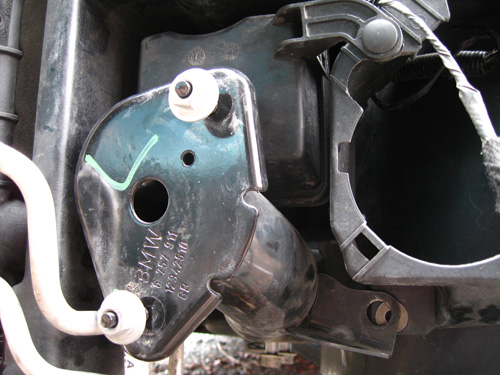
Now, to drop the front panel out of the way, you need to remove two silver bolts that are just behind the bumper mounts:
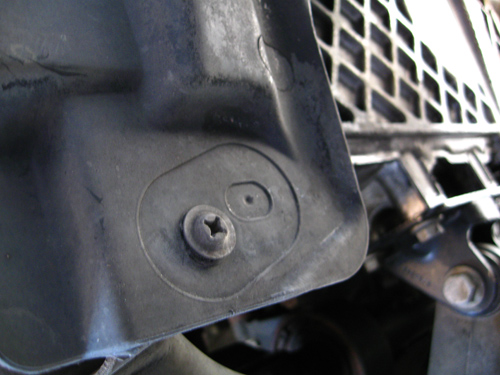
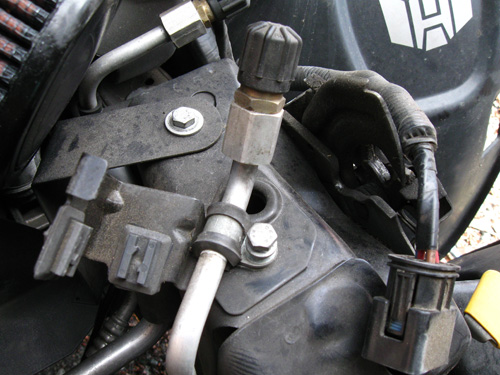
And dismount the A/C freon valve that is bolted just beside the hood latch release:
With all of that junk disconnected, the radiator panel will fold down out of the way. Be careful as the air conditioner hoses will still be attached. You can lay the panel down without damaging the A/C lines, just be gentle.
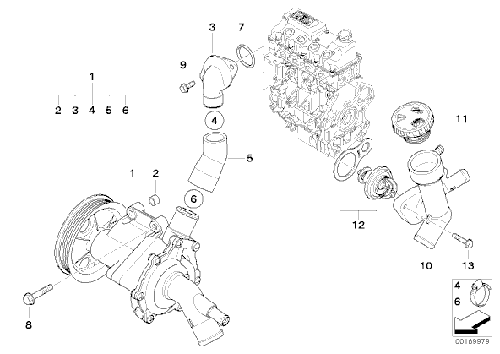
The water pump is located on the left side of the engine (as you’re facing it) just above the A/C compressor and below the alternator.
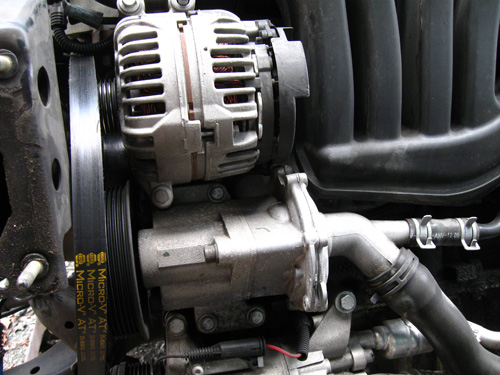
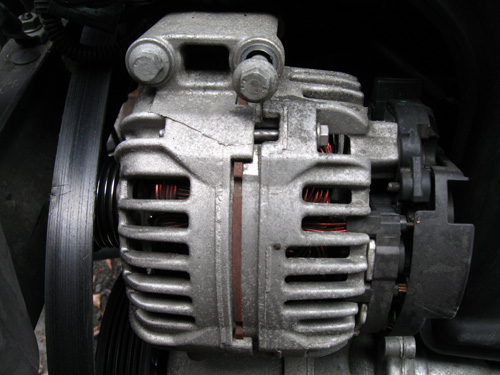
To remove the pump you must first unbolt the alternator. Remove the 4 bolts and set the alternator aside. You can disconnect the wires if you need more room, but I just set mine on the upper strut mount area.
Remove the hoses attached to the water pump. You may want to unbolt the metal elbow that mounts to the engine block and connects to the coolant hose. Mine had a little bit of corrosion on the inside but was quickly fixed with some light sanding with 200 grit sandpaper. Now is a good time to replace coolant hoses if you see any cracking or if the hoses don’t feel pliable.
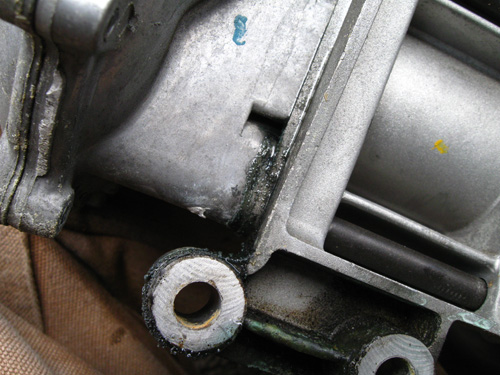
My old water pump showed clear signs of a leak, most likely from a failing bearing. There are two weep holes that allow for coolant to seep out and give warning before a catastrophic pump failure. The only problem is that the coolant weeps onto the top of the A/C compressor and then onto the lower bumper cover so it is difficult to see a puddle of fluid form on the ground once a failure starts. Be sure to take a peek at the compressor area every time you change your oil and keep an eye on your coolant reservoir when you check your oil…you do check your oil every week, right? One of the two water pump weep holes is visible in this picture as are the gummy blue boogers created by the leaking coolant.
The water pump should mount easily to the block. Reconnect the hoses and be sure that the spring clips are tightly fitted. Put the alternator back on making sure the ferule on the water pump mount mates into the alternator mount before re-bolting everything. I slipped the serpentine belt back on at this stage since it was easily accessible with the entire front end off of the car. Replace the radiator front panel and re-mount the A/C valve. Ensure that your hood will close correctly after mounting the A/C freon valve. I kept trying to mount it incorrectly and couldn’t figure out why the hood was smacking into the valve.
Basically now re-installing everything is, as the Haynes Manuals are fond of saying, “the reverse of removal”. Take your time, look at where everything should go and be sure leave no bolts or nuts unused. When it comes time to re-fit the bumper cover, be sure to reconnect the lights and temperature probe before you fully bolt it back in place. Once the cover is fully mounted, it’s difficult to get your hands down behind it to clip in the connectors (I know this from experience).
I started this job at about 8:30 in the morning and finished around 4:30 in the afternoon. I took my time, stopped for lunch and had to repair some broken plastic bits with epoxy…in addition to rotating the tires and bleeding the brake lines. So, your times may vary. Again, please DO NOT take on this task unless you are a reasonably seasoned mechanic or are very comfortable working on cars. The work is not difficult and requires few specialized tools but can get confusing when you’re looking at the naked front end of your car and a pile of nuts and bolts. Take your time, take lots of digital pictures to help with reassembly (trust me, this is very helpful) and consult a Bentley manual as needed. Good luck!